 BORETS
In this guide
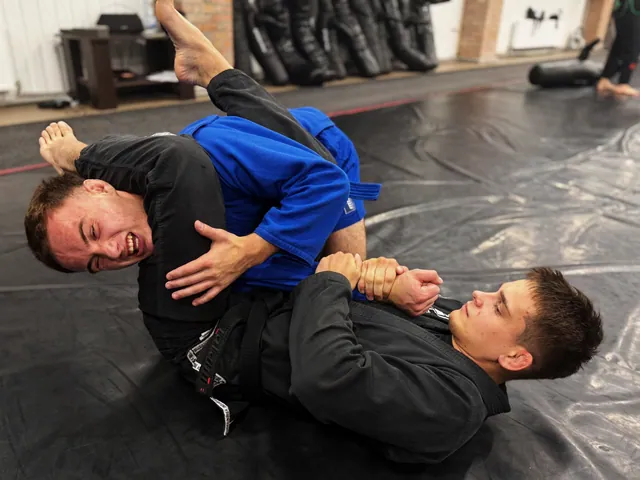
A kimura grip connects your two hands around an opponent’s arm in a figure-four arrangement. In BJJ, that connection can support positional control and transitions as well as a submission. The key learning question is what happens to the opponent’s shoulder and torso when they move—not simply whether you can hold their wrist.
Build the figure-four around a bent arm
One hand controls the opponent’s wrist. Your other arm wraps around their upper arm and connects to your own wrist, forming a figure-four. Keep the opponent’s elbow bent rather than allowing the arm to straighten away from the structure. An approximately right-angle bend is a useful teaching reference, not a demand to force every shoulder into an identical shape.
The two hands have different jobs: one keeps the wrist connected, while the wrapping arm helps contain the upper arm. Their connection lets you move the captured arm as a unit. If the wrist slips or the elbow straightens beyond your control, the figure-four may still look connected while losing much of its positional usefulness.
Control the shoulder with the body
Consider a top side-control entry against the far arm. Your chest and base must keep track of the opponent’s torso as you establish the grip. If you lift your whole upper body away to reach for the wrist, you may give the opponent room to turn toward you or rebuild a frame before the kimura is organized.
The grip becomes more useful when the shoulder cannot freely follow every movement of the hand. That relationship explains why a kimura is more than a wrist hold. The controlling movement involves the bent arm and shoulder connection, with your torso supporting the action. Bending the opponent’s wrist or pulling only with the forearms changes the problem instead of improving that connection.
A defended grip can become a positional tool
The defender may join their hands, grip clothing or bring the elbow back toward the ribs. Those reactions reduce how independently you can move the captured arm. Instead of treating every defensive grip as something to tear apart, notice what happens to the torso and which direction the defender can still turn.
The figure-four can help you follow that turn or guide a transition while maintaining awareness of the shoulder. Your hips need to move with the exchange; staying planted while the opponent’s torso rotates leaves the arm carrying the difference. If holding the grip costs a stable top position, release or change control deliberately. Keeping the kimura is not automatically the best outcome of every exchange.
Troubleshoot the first lost connection
If the wrist slips immediately, review the initial grip with the coach. If the hand stays connected but the opponent rolls or turns freely, review your relationship to their torso. If you abandon a stable top position just to keep the figure-four, review the purpose of the transition. These failures call for different corrections.
Film only consensual training and use a wide angle that includes both bodies. Watch the moment before the obvious failure: the defender’s shoulder movement may explain what happened later to the grip. Write one observation, such as “I stayed in place while the torso turned,” and test a coach-approved correction in the next controlled round.
Train the grip, control and transition as separate stages
First form the figure-four with a cooperative partner and confirm the wrist, elbow and shoulder relationships. Next let the partner reconnect the arm to the torso at a moderate pace. Finally add one agreed turn and maintain the position or choose a clear transition. Observe whether your hips follow before the arm becomes isolated.
Use supervised adult practice, stay away from the shoulder’s end range, apply any finishing pressure gradually, tap early and release immediately. Check current IBJJF event and division restrictions. A useful result is knowing exactly which stage failed: obtaining the grip, containing the shoulder or moving with the torso. Each calls for a different correction.